


Supplies needed
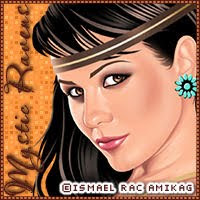
I am using the art of Elias Chatzoudis which requires a license you may purchase his art here.
Skrapkit used “A is for Attitude” by Kittz Creationz which is a FTU collaboration kit you can download from here.
Template used “Wicked Gurl” by Kristin at Toxic Desirez go down to her name and can be downloaded here
Mask of choice
Font used shermlock
This tut is written for those who are familiar with or have experience using psp. I used PSPX2 but any version will do. Any similarities to this tut to any other one is purely coincidental.
Let’s begin remember to save often.
Open template delete copyright layer.
Select oval layer of template using magic wand tool click on layer
Open scrapkit-open paper 19 copy, paste as new layer over template layer up to selections-invert-delete-select none delete original template layer.
Select frame back layer using magic wand tool click on layer
Open paper 16 copy, paste as new layer over template, up to selections-invert-delete-selections-none.
Delete original template layer
Select Rectangle 1 using magic wand tool select layer
Open kitty paper copy-paste as new layer over template up to selections-invert-delete-selections-none. Delete original template layer.
Repeat the same steps for Rectangle 2.
Open heart lock element resize to 45% copy-paste as new layer position as it is in the tag. Apply drop shadow with the settings 3, 1, 60, 5.00, duplicate-image-mirror.
Open fuzzy hearts element resize 60% copy and paste as new layer place above heart lock element. Apply drop shadow with these settings, 3, 1, 60, 5.00, duplicate-image-mirror.
Open kitty bones element resize 65% place on top of fuzzy heart layer apply drop shadow with the same settings as above.
Open I lveMy* element resize 45% copy-paste as new layer- position element as it is in my tag. Apply the same drop shadow settings as above. Duplicate-image-mirror.
Open clip heart resize 40% copy and paste as new layer positions the clip heart as shown in my tag. Erase the center of the clip, apply drop shadow with the same settings as above. Duplicate and mirror as many clips as you like placing them where you like.
Open mask of choice
Open paper 18 copy-paste as new layer move paper layer all the way down just above white layer background up to layers new layer-from image choose mask apply-merge group.
Open tube image copy-paste as new layer position in center duplicate move duplicate layer below original layer up to adjust-blur-gaussian blur-5.00.
On original layer double click to properties and change from normal to overlay apply drop shadow with these settings 6, 4, 60, 14.00.
Apply copyright info save and you’re done!
Thanks for doing my tut!


No comments:
Post a Comment